Plumbing

How to Know When to Call an Emergency Plumber

When a plumbing emergency occurs, it’s important to know who to call right away. Researching plumbers can seem time-consuming, especially in a crisis, but it is worth it to find a plumber you trust. Look for online reviews and testimonials.

Plumber

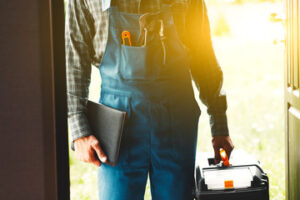
Some plumbing problems are more serious than others. Knowing when to call an emergency plumber can help you save money and avoid costly repairs. Contact Plumbers Spring TX for professional expertise.

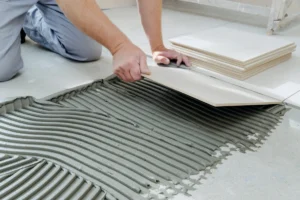
When drains clog, it’s an emergency because it can prevent water from flowing out of your sinks, bathtubs and toilets. Clogs usually occur because hair, soap scum, grease and other debris stick to the inside of your pipes. They may also be caused by tree roots or by a broken pipe.

Clogged drains are often accompanied by foul smells or water that backs up from your toilet, shower or tub. If this occurs, call an emergency plumber right away. In some cases, a clogged drain can cause your toilet or sink to overflow, which can result in water damage to your counters, floors and walls.

Most clogs require the help of an emergency plumber to remove them. However, there are a few things you can try before calling a professional. For example, if the clog is caused by grease, pouring hot water down the drain may break up the blockage. Pouring boiling water down the drain several times, letting it cool in between, may also help to dislodge the clog.

You should also consider using a plumbing snake or auger if your clog is deep and doesn’t respond to other methods. These tools can break up or dislodge a blocked line without damaging your pipes and are available at most hardware stores.

You can help reduce the risk of clogs by keeping food scraps, grease, fats and oils out of your kitchen drain lines. It’s also helpful to use a garbage disposal that is regularly maintained. It’s a good idea to use food strainers or drain catchers to collect large particles before they enter your drains. You should also avoid flushing anything other than toilet paper down the drain.

Burst Pipes

A pipe that bursts can cause serious water damage to your home. Not only will it lead to a messy cleanup, but it could also result in costly repairs and mold growth. This is why it’s important to know the warning signs and act quickly. Keep an eye out for dripping or gushing water, discolored water, and unexplained increases in your water bill. If you notice any of these symptoms, call a plumber right away.

The most common reason for a pipe to burst is freezing. In cold climates, it’s very easy for pipes to freeze and expand. This is especially true if they’re exposed to extreme cold or aren’t properly insulated. Pipes that run through unconditioned spaces like attics, crawl spaces, or basements are particularly susceptible to freezing, as are those that travel along exterior walls.

If you suspect a pipe has frozen, turn off the water supply to that area and try to thaw it out before calling an emergency plumber. It’s also a good idea to move any furniture or belongings away from the area of the leak, as this will help prevent further damage and make it easier for your plumber to access the problem area.

If you can’t find the source of the leak, look for puddles of water around your home. Large puddles in several areas typically indicate that the burst pipe has caused significant flooding and will continue to flood until the water supply is turned off. If possible, plug the leak with rags or towels to stop the flow and reduce water damage. You should also use a wet/dry vacuum or submersible pump to remove any standing water from your home.

Sewage Backup

Sewage backups are not just a disgusting mess; they also pose a serious health hazard. Raw sewage contains dangerous bacteria that can make you and your family very sick. It can also contaminate your household water, causing your plumbing fixtures and appliances to stop working. To avoid this catastrophe, it is important to call an emergency plumber right away if you suspect a sewage backup.

The most common cause of a sewage backup is a blocked sewer line. This can happen when people flush items down the toilet that are too large or shouldn’t be in the pipes, like diapers, sanitary products, and grease. Another common cause of a sewer backup is when the weather is too hot and rainwater backs up into home sewer lines.

If you have a sewage backup, shut off all water in your house and move any furniture or appliances away from the affected area. It is also a good idea to wear rubber gloves and masks when cleaning up the mess. If the sewage is flowing near electrical outlets, you should turn off the electricity to prevent electrocuting yourself. You may also want to evacuate the affected area and use fans, dehumidifiers, and window air conditioners to help speed up the drying process.

If you think your sewer line has backed up, contact an emergency plumber immediately. A reputable plumber will be able to quickly diagnose the problem and determine the best solution. Before choosing a plumber, check their reviews and responses to complaints online. A high number of positive reviews and a professional attitude are good signs that the plumber is legitimate. To find out more about the plumbing services offered by Kowalski, click here.

Gas Leaks

Gas leaks are among the most dangerous plumbing emergencies, as they can cause explosions and poison your home with carbon monoxide. A few simple steps can help you determine if you have a gas leak. If you smell rotten eggs or other foul odors, see dead plants inside and outside your house, or hear a hissing sound near your gas lines, contact an emergency plumber right away.

Before a plumber arrives, turn off your gas supply at the main valve and move everyone in the house to a safe location. A licensed plumber can then shut off the gas and repair the leak.

In addition to the sulphur-like odor of natural gas, you might also notice a white cloud or bubbles in standing water, hear a hissing noise, or notice that your plants and grass are wilting and dying. Some people have even experienced nausea and fatigue, which can be a sign of carbon monoxide poisoning. In extreme cases, this can lead to unconsciousness and death.

Leaving a gas leak unattended can be very hazardous, especially if there are children or elderly people living in the house. To avoid such a scenario, it is important to call an emergency plumber as soon as you notice any signs of a leak.

An emergency plumber will arrive faster than a standard plumber since they are already on their way to your house. They will have the necessary tools and equipment to fix your leak quickly, so you can get back to your regular schedule. In addition, they will take extra care to ensure your safety while they are working on a hazardous problem like a gas leak.

Water Leaks

An emergency plumber can fix a variety of plumbing issues, from burst pipes to clogged drains. However, it’s important to know when to call for help. This helps prevent further damage to your home and saves you money on repair costs. To find the right emergency plumber, you should consider their credentials, experience, and pricing structure.

An experienced and qualified emergency plumber will have a good understanding of the local plumbing codes and regulations. They’ll be able to work efficiently and quickly to resolve the problem and leave your home in good condition. An emergency plumber will also be able to provide you with advice on how to avoid future problems.

A water leak can cause significant damage to your property if left untreated. A simple drip from a faucet or a toilet can become an expensive flooding disaster if it’s not fixed quickly. An emergency plumber will have the tools and equipment needed to stop a water leak in its tracks and minimize the amount of damage it causes.

To determine if you have a water leak, turn off all of the faucets and showers in your home. Then, use a leak indicator or check your water meter to see if the reading has changed. If the reading has changed, you probably have a water leak somewhere in your home. If the leak is coming from a faucet or shower, it’s probably an easy fix for your emergency plumber.

If the leak is coming from a pipe in your yard, it may be more difficult to locate and fix. In this case, it’s best to shut off the main water valve in your home before calling for help. This can be found in the basement or garage directly behind your home’s water meter, or outside below any outdoor faucets.

Home Improvement

Tile Installation – Laying and Cutting Tiles

Installing tiles requires special tools for cutting and laying the tiles. It’s also important to understand how the subfloor (such as plywood, cement backer board, or uncoupling membrane) must be prepared for tiling.

For best results, begin with two perpendicular chalk lines in the center of the room. Adjust these chalk lines until tile measurements at opposite walls are the same. For more information just visit Bathroom Remodelers Milwaukee.

The first step in laying tile is creating a layout plan for the project. This will help the installer estimate the product needed and identify any potential installation issues caused by architectural features like stairs or transitions. It will also give them a better sense of how the finished floor will look.

The most basic tile layout is a grid pattern, which minimizes the number of cuts and provides a neat, uniform finish. However, this can also result in a dull or sterile space if the tiles need to be more interesting or the design needs to be more complex. Mix and match different tile sizes to create a unique pattern or experiment with a more complex layout, such as herringbone.

When planning a tile layout, it’s important to start in the center of the room and work outwards. It can be tempting to pick a wall and start laying tile there, but this will leave the final product looking crooked. It is best to apply a row of tiles from the center and then move outwards, including some tile spacers between each row.

This method works well for standard tile sizes but can be challenging with larger tiles or ones with an unusual shape. In these cases, taking a piece of graph paper and sketching a detailed layout blueprint is helpful. This will allow you to see if any rows require sliver cuts, which can be difficult to correct later.

When setting irregular tiles, a grid layout is usually the best option. This will ensure that the grout lines are evenly spaced so they won’t appear squished or uneven. If you’re using a natural stone tile, consider the appearance of its unique veining patterns and color variations in your design plan. These features can add a lot of visual interest to the finished room. If you need help with your layout, ask a professional for assistance. They’ll be able to walk you through the process and suggest ways to improve the results.

Before beginning the tile installation, you must ensure the substrate is ready. You should use a cement backer board or a similar material that is also waterproof. It should also be able to support the weight of your tiles. This is important because too much weight on a small area could cause it to crack or even break.

The type of substrate you need will depend on the type of tile and its intended use. If your tile is installed in a moisture-prone area, you may need a special waterproof membrane or self-leveling underlayment. You should also figure out whether you need a transition at doorways available in various styles and materials.

Plywood is acceptable as a substrate for some flooring applications, but it should be exterior-grade and only in dry areas. There are better choices for wall tiles, although they can be used as a layer of underlayment for tile over wood. It is often combined with another layer of underlayment, such as a crack isolation membrane or an uncoupling membrane.

Before installing the tile, ensure you have all the necessary tools and supplies. Most home centers carry most of these, but you’re better off shopping at a specialty tile store, where you can get expert advice and more extensive product selections.

You will also need to choose a thinset mortar, the adhesive that holds the tile in place. Thinset typically combines Portland cement, fine sand, and water. For best results, you should use a trowel that has notches the size of your tile’s thickness to mix it and create grooves in the mortar that will improve adhesion.

Once you’ve mixed the thinset, you should allow it to “slake” for about 10 minutes, which is when it becomes thicker and denser. Then, you can begin laying the tile. Work in easy-to-manage sections, and avoid walking on the newly laid tile until it’s completely set.

Cutting tiles is an essential part of any tiling job. Even the most straightforward jobs require some cutting to fit pieces in corners or work around obstacles. Different cuts need different methods and tools, so planning for the types of cuts you’ll be making is important to ensure a professional-looking finished product and minimize wasted material.

The most common type of cut for tile is a straight cut. To make a straight cut, mark the tile where you want to make your cut with a pencil guideline. Then, use a tile cutter or wet saw to cut off the tile. When using a power tool, always insert notches into the tile before cutting it completely to lessen the chance of chipping. If you don’t have a tile cutter, use a Dremel or an angle grinder with a diamond blade. Notching your tile is also helpful if you work with curved cuts, which can’t be made with snap cutters.

If you’re using a wet saw, follow all manufacturer instructions for safety and accuracy. Also, wear safety goggles and gloves and keep water and dust out of your lungs. Using a hand tool, use industry-grade clamps to hold the tile in place and avoid accidentally chipping it. After the tile has been cut, clean up the edges with a rubbing stone to smooth them out if needed.

When it comes to curve cuts, the best way to do them is freehand, but you can also use a tool called a contour gauge or round objects like cans or lids to help you create a curved line. Then, use a tile cutter to score the tiles where you’ll need to cut them and nip off the excess with a tile nipper. If you’re working with a nipper, squeeze it firmly to make a small nip and not push too hard, or the handle will break the tile.

You can also use a Dremel tool with a diamond blade or an angle grinder with a masonry bit for smaller curved cuts. When working with a curved surface, apply slow and steady pressure to minimize the possibility of breaking the tile.

Professional tile installers work bare-handed, but you should wear gloves if you have sensitive skin. Mixing and working with cement products like thinset can draw moisture from your skin, resulting in burns requiring medical attention. Also, it would be best to consider wearing eye protection when mixing and installing tiles.

The most important step in your tile installation is establishing the layout. A good design ensures that trimmed portions of tiles are symmetrical from side to side and that grout lines are level and plumb. For wall tile projects, layout perpendicular layout lines using chalk to guide your tiling.

Before spreading your thin set, spray the backer board lightly with water to prevent it from soaking up too much of the chipset. This can cause the mortar to dry too quickly, affecting how well it bonds with the subfloor.

Apply the thinset with the notched edge of your trowel, which should be set to a size that matches your tile thickness. After you’ve spread a thin coat, comb it with your trowel to create furrows, which helps release air bubbles underneath the tile. Searching the light set in one direction is crucial because if you move in a circular motion, you’ll leave hollow points under your tiles.

Press it into the thinset with firm, even pressure when laying your first tile. After you’ve placed it, lift it and check for a solid layer of thin set with 80-90% coverage across its back surface. If you don’t have enough thin-set on the back, recheck the consistency of your thin-set and reapply it to the back of the tile.

Use plastic spacers to maintain consistent spacing between rows while laying the tiles. For example, keeping the vertical grout joints offset by exactly half of the tile width is critical if you’re using a running bond pattern.

At this point, you can see the real payoff of your planning efforts. As long as you follow the guidelines in this article, your tile project will look great and last a very long time.

Portable Restroom

Benefits of Bathroom Pods

Outdoor Bathroom Pods are a valuable construction solution for multifamily apartment projects. They can save project teams time and money while providing a higher level of quality than traditional bathrooms.

Tight design and manufacturing processes in an offsite environment mean fewer defects. Streamlined installation reduces waste levels and makes for a cleaner job site.

portable restroom

Bathroom pods are designed, built, and quality-approved in a controlled factory environment, which is far more efficient than traditional construction on site. For example, prefabricated wall and floor panels can be machined in the factory, ensuring that the design is fully adhered to and that each panel is a precise fit, saving time on site. Similarly, the production process is more predictable and streamlined so that trades can work with greater precision on tasks such as electrical installations, tiling and sealant application, something that is difficult to control on site.

A modular approach also provides the opportunity to reduce the number of different suppliers required on a project, delivering cost savings. For instance, a conventional construction would typically require multiple different bathroom products from a range of manufacturers and multiple subcontractors such as plumbers, electricians, glaziers, tilers, interior designers and carpenters. This is not only inefficient but can lead to disputes and delays on a project.

With bathroom pods, the manufacture and construction is completed by a single supplier, removing the need to coordinate and manage multiple supply chains. This streamlined process also allows each pod to be fully tested and quality-approved prior to shipping, which reduces the risk of defects on site.

Increasingly, manufacturers of pods are designing each design to be fast and simple to install on site, for example, with mechanically-fitted pan connectors and pre-wired junction boxes to simplify plumbing and electrics. This efficiency enables the bathroom to be offloaded, lifted, and installed on the floor in just hours – significantly faster than it can be constructed on site and reducing the need for additional storage on site. This translates into a faster return on investment for the developer or early occupation for the client, as well as reduced snagging and the assurance of completion on time and within budget.

Bathroom pods are manufactured in a controlled offsite environment, meaning they can be produced in parallel with on-site construction and installed quickly, reducing overall project timelines. They also allow for tight quality control and consistency, which reduces the risk of problems on site. This can be a significant benefit on complex projects where multiple trade professionals are working in limited space and constructing precise finishes.

When choosing a manufacturer to supply pods, ensure they have a good track record and financial stability. A visit to their factory can also be beneficial, as it allows you to inspect the manufacturing process and see if they can meet your specifications. The company should also be able to demonstrate their expertise in design and construction.

Another factor in shortened construction times is that bathroom pods are completed offsite, so there is no need for tradespeople to travel back and forth to site with building materials. This helps to keep onsite disruption and noise levels low, creating a safer and more efficient work environment.

The design of bathroom pods also makes them more energy-efficient. In addition, the manufacturing process of these prefabricated units uses fewer raw materials than traditional onsite construction, which results in a lower carbon footprint. This is ideal for construction projects that are focused on sustainability and green building certifications.

Finally, prefabricated bathroom pods require less storage space, as they can be delivered to a construction site fully completed. This means there is no need for builders to find additional storage space or create a bespoke storage solution on a busy construction site. The reduced program saved through the use of pods can result in faster returns for developers or early occupation for clients.

Pods can be designed and built in a range of sizes and dimensions to meet different project requirements. As they’re prefabricated in a controlled factory environment, the quality and standards remain consistent from one unit to another – making them an ideal construction method for complex or multiple occupancy developments such as hotels, schools, hospitals, or student accommodation.

Using bathroom pods also provides significant flexibility on a construction site. As a result, the overall construction programme can be reduced significantly and completed to an earlier date. This helps reduce construction loan interest and enables tenants to move in sooner, giving a better return on investment for developers.

The use of bathroom pods also eliminates a large number of work at heights and reduces the amount of heavy materials that need to be transported around the construction site. This reduces risks for workers, improving safety and reducing the number of accidents that occur on site.

Another advantage of bathroom pods is that they can be designed and manufactured to include domestic water piping, electrical components, lighting, and GFCI (ground-fault circuit interrupter) whips that are ready for connection. This means that installers don’t have to spend time laying out and cabling these connections on site, which helps improve productivity.

Achieving this level of flexibility does require some upfront planning and an early design freeze so that the bathroom pod manufacturer can order all of the components and start manufacturing. However, the payback in terms of increased productivity on site and a quicker completion schedule will more than offset this initial hard cost.

Pods are built with light gauge steel framing for superior strength and accuracy, as well as moisture-resistant wallboard that ensures the unit will last. They’re also delivered fully finished to the job site, meaning you don’t have to pay extra for installation, labour and materials like with traditional on-site construction. These savings add up over the course of your project, helping you save money and stay within budget.

Bathroom Pods are also made offsite, which means you eliminate the need to coordinate several subcontract trades at the same time. This reduces the amount of labour, supervision and equipment requirements on-site – as well as cutting down on materials wastage and storage costs.

Another advantage of using pods is that they’re often built to higher quality standards than those constructed on-site, which helps you achieve better results for your clients and minimize any defects in use. For example, the tiling is typically set in such a way that it won’t come loose over time, and the caulking joints have a smooth finish.

Although bathroom pods offer many benefits, they do require some planning and coordination to get right. This includes early design freeze to ensure the pods are designed to fit seamlessly into your building and are manufactured efficiently, as well as careful sequencing of the site works to avoid clashes. Using pods can also have a commercial impact on your project’s cash flow, as the upfront procurement of high-cost fitting-out materials is essential. However, the long-term cost benefits of using pods far outweigh this initial investment.

Bathroom pods are designed and built in accordance with project-specific requirements and dimensions. They can be used in a wide range of buildings, from student accommodation to military housing. The design of the pods is adapted for each use and a full range of plumbing, electrical and other services can be fitted. Unlike site-based construction, there is often only one pod supplier for all the products and materials that need to be delivered to site, simplifying procurement and mitigating delays caused by multiple suppliers bringing in different materials.

The production line environment of offsite manufacture can also offer consistency and improved productivity, while the repetitive nature of pod production makes it much easier to achieve consistent quality standards than on site. Pre-delivery testing in the factory should be stringent, with any defects rectified and remedied prior to installation, to minimize the risk of any on-site issues.

With offsite production, the waste produced on a construction site can be reduced. This is because the factory uses lean processes that optimize the use of materials and eliminates waste. There are also strict environmental regulations in place that ensure a high level of sustainability and compliance.

Increasing demand for quick and efficient construction solutions during the pandemic drove growth in the global prefabricated bathroom pods market. This was due to the urgent need to build hospitals and isolation facilities, which were unable to be constructed in time using traditional methods.

As the market continues to recover, we are seeing more developers looking into the benefits of using pods in their developments. They can help reduce programme, meaning that properties are occupied sooner and return on investment is gained earlier too. This can save on construction loan interest, giving a more rapid return to investors.

Home Improvement

Planning a Kitchen Remodel

A kitchen remodel can increase the value of your home. It can also make your home more functional and comfortable.

Kitchen Remodel

When it comes to a kitchen renovation, it’s important to determine your goals. This will help you choose the right design and materials for your remodel. It will also help you stay within your budget. Click here to learn more.

The kitchen is the heart of most homes. It’s where people gather to cook, eat and socialize. A well-designed kitchen can improve the quality of life in your home, and increase its resale value. A remodel can be a costly project, so it’s important to plan your budget carefully.

The largest portion of any kitchen remodel budget is typically allocated to cabinetry. This is because the cabinets are one of the most visible components of the design, influencing the overall style and color palette. However, homeowners can save on cabinet costs by choosing less expensive materials or opting for a stock cabinet line instead of custom options. Another major expense is labor. This can easily consume 20 percent of the total budget. By keeping the design simple and avoiding unnecessary ornamentation, you can minimize labor costs.

Appliances are also a large component of kitchen remodel costs. By selecting energy-efficient models, you can make a big difference in your energy bills while saving money in the long run. Also consider working in unique storage options like pull-out pan racks, bins and trash containers to make the most of your space.

Depending on the scope of your kitchen remodel, it may be necessary to move plumbing or knock down walls. These projects are more expensive than simply replacing appliances or kitchen cabinets, and can quickly blow your remodeling budget. By planning ahead, you can avoid unexpected expenses and surprise setbacks.

With the right planning, a kitchen remodel can be enjoyable and rewarding. You can also ensure that your remodel is completed on time and within budget by hiring a reputable contractor. New Life Bath and Kitchen can help you make sure your kitchen remodel is successful.

Design

When planning your kitchen remodel, keep in mind the latest design and layout trends to create a contemporary space. Make sure to include enough storage and a workspace that is safe for food prep. For example, installing a GFCI outlet and moving electrical outlets away from water sources can prevent accidental shocks. Also, updating the kitchen with new appliances and lighting can improve energy efficiency and safety.

Choosing the right floor materials is another important kitchen remodel design element. The color, texture, durability, and cost of different materials can have a significant impact on the overall kitchen design. If you’re unsure which materials to choose, visit local showrooms and home renovation stores for ideas.

Other kitchen remodel design elements to consider include the kitchen floorplan and lighting. A well-lit kitchen is crucial for cooking and keeping things organized. Consider adding natural light through windows and skylights and using a combination of task-, under-cabinet, and overhead lighting to create an inviting space.

When it comes to the layout, group similar items together to make everyday tasks more efficient. For example, store coffee mugs and grounds near the coffee maker so your groggy morning self doesn’t have to hunt for them. Similarly, place dishware and flatware within reach of the dishwasher to simplify unloading. Also, placing an oven and refrigerator close to each other can save time by reducing the distance you have to walk between them.

Layout

When remodeling a kitchen, it’s important to consider the layout. You may want to make changes to the flow of the room, including relocating appliances, changing the position of cabinets, and adding or removing walls. This can have a big impact on your kitchen’s overall functionality and look.

The layout of your kitchen should be based on how you use it and the needs of your family. You should take into account things like how many people cook in your household, if you have small children or elderly family members, and what cooking and cleaning habits you have. The layout of your kitchen should also be designed to allow for an efficient work triangle. This involves placing the sink, stove, and refrigerator in a triangular pattern. This is a great way to increase efficiency in your kitchen by making it easier to move between tasks.

You can choose from a variety of different kitchen layouts to find the best one for your home. Some of the most popular include U-shaped, L-shaped, and galley. However, it’s important to remember that the exact layout will depend on the size of your kitchen and floor plan.

A U-shaped kitchen layout is perfect for large kitchens and can accommodate a lot of counter space. It can also be used with a smaller kitchen to create an open concept floor plan.

A G-shaped kitchen layout is similar to a U-shaped layout but has a partial fourth wall, also known as a peninsula. It’s ideal for larger kitchens and works well in an open concept floor plan. You can also add upper cabinets to the side of the kitchen without a peninsula for extra storage.

Materials

The materials you choose to install in your kitchen remodel can have a major impact on your budget. Visiting specialty design showrooms can help you get a feel for what’s available and give you ideas about how different elements might work together in your kitchen. You can also talk to professionals who can answer your questions and help you find the right products to suit your needs and goals.

When planning your kitchen remodel, consider the type of material you want to use for the countertops and cabinets. There are a few popular choices that include stainless steel, granite or quartz composite, and cast iron. Each has its own benefits and drawbacks, so think about what’s important to you before making a decision.

Increasing storage space is another common reason for kitchen remodeling. Grocery stores now offer family-size product lines that won’t fit in many current cabinets, so it may be time to add more space. A remodeling professional can recommend clever storage solutions for small spaces that will increase efficiency and make your kitchen more usable.

Some homeowners also remodel their kitchens to improve safety. For example, adding a GFCI outlet and moving electrical outlets away from water sources can reduce the risk of electrical shock. These types of upgrades are easy to implement and will add value when you’re ready to sell your home.

Contractor

A kitchen remodel is a major home improvement project that increases both style and functionality. However, it can also be a complex process that requires time and patience. It’s important to hire a professional who can help you manage your renovation effectively. They can assist with design, budgeting, and acquiring permits. They can also ensure that the job is done safely and on schedule.

If you want to remodel your kitchen, the first step is to assess your needs and goals. Once you have a clear idea of what you want, the next step is to create a kitchen remodeling plan and design. This will help you decide what fixtures, appliances, and materials to use. It is recommended to visit kitchen showrooms and home renovation stores to get ideas and inspiration. You can also watch videos and read online articles about kitchen remodels.

Structural changes are a key part of any kitchen remodel. This can include removing walls, adding or removing partitions, and expanding or changing the floor plan. In addition, you may need to make structural modifications to accommodate new appliances and plumbing. This phase can be the most expensive and disruptive part of a kitchen remodel, so it is essential to find the right contractor.

When doing a kitchen remodel, it is important to consider how the final product will affect future buyers. Over-customizing a kitchen can limit its appeal to a specific market and reduce its resale value. Moreover, over-elaborating on a kitchen’s appearance can increase the cost of the overall remodel. In addition, it’s a good idea to invest in energy-efficient appliances to save money on utility bills. It’s also a good idea to install GFCI outlets and to move electrical outlets away from water sources to prevent fire hazards.

Home Improvement

How a Bathroom Remodel Can Add Value to Your Home

Bathroom Remodel Cincinnati is a significant investment that can increase the value of your home. The project is one of the most cost-effective ways to improve your quality of life.

Bathroom Remodel

A remodel can eliminate safety hazards like rusty water heaters, corroded shower drains, lead paint and mold and mildew. It can also provide added storage by building linen and supply closets.

The plumbing in your bathroom is essential for everything from getting ready for the day to unwinding at night. If your bathroom isn’t meeting all of your needs, a remodel or renovation can breathe new life into the space and add value to your home.

One of the first things homeowners need to decide is whether they want to do a full-scale remodel or just renovate some of the existing elements. This will help determine costs as it will impact how much the plumber needs to work with the existing piping. Working with existing pipes means that the contractors can only do what is feasible within the piping constraints of the room, which usually means a tub-to-shower conversion or moving a toilet.

A remodel is a more extensive overhaul of the entire bathroom that can include changing the location of the toilet or shower, removing and replacing drywall, and adding or replacing cabinets, lights and paint. It can also involve installing a walk-in tub, replacing the sink and faucet, or relocating the drains.

In addition to determining the scope of work, this is also where homeowners need to think about whether they will be selling the home in the near future and what upgrades might increase functionality or appeal to buyers. For example, if you’ll be staying in the house for the long haul, it might be worth upgrading to grab bars or non-slip flooring that can make the bathroom more functional as you age.

Regardless of which type of project you’re planning, the most important consideration is to hire licensed plumbers. They are the experts who can ensure that your remodel is done correctly and safely and will continue to function properly for years to come.

Electrical

Electrical systems in the bathroom must meet specific requirements based on their exposure to moisture. Professional electricians have the expertise needed to ensure your new bathroom’s wiring and lighting are safe and up to code.

During a bathroom remodel, the electricians will install or rewire your system based on the design plan and layout changes. They will also add or relocate receptacles and light fixtures as necessary. Wiring is typically concealed within walls, ceilings, and floors for a finished look.

Bathroom remodels usually require GFCI outlets. These outlets are designed to shut off in the event of a short, which reduces the risk of electrical shock. Professionals will also ensure your home’s system is grounded, which helps prevent electrical shock and fire hazards.

You may need a dedicated circuit for your bathroom receptacles and a separate circuit for the lights, especially if you have a large whirlpool tub. The NEC suggests these circuits be on a 20-amp branch, but you should check with your local building inspections office to see what is required in your area.

Your remodeling project may also necessitate an upgrade to your electrical panel. Your electrician will let you know if this is necessary, but it is important to familiarize yourself with the location of your electrical panel before they arrive. This will allow you to better understand what they are doing, as well as to make sure it is up to date and ready for your future needs. It is also a good idea to talk with your electrician about universal design upgrades that can make your bathroom safer and more comfortable for everyone in the family. This can help you stay in your home longer, while still enjoying the comforts of a modern bath.

Flooring

Flooring is one of the most significant design decisions when remodeling a bathroom, and while there are many materials to choose from, there’s also one important factor that every homeowner must consider: moisture resistance. Since the bathroom is a high moisture area, choosing a material that can stand up to humidity and is slip-resistant should be top priority.

The best choice for high-moisture areas is tile. It’s durable, water-resistant and available in a wide range of designs and colors. Ceramic and porcelain tiles—and some manufactured options that mimic natural stone—are ideal in a bathroom. They come in a variety of shapes and sizes, including larger planks that create a more dramatic floor look and are easier to clean.

While solid hardwood is beautiful, it’s not recommended for bathrooms because of its sensitivity to moisture. It requires perfect installation, and even then, the smallest amount of moisture can rot the wood. To help counter this, consider engineered wood products. These are designed with a plywood base that holds up better against moisture, while the top layer is real hardwood veneer.

Another waterproof option is rigidcore vinyl, which comes in both plank and square tile formats. This is a good option if you want the look of real wood or stone but can’t afford to pay for those products. Waterproof laminate (WPC) and luxury vinyl tile (LVT) are a similar product, combining the durability of vinyl with the appearance of wood or stone.

Finally, cork is an eco-friendly option that’s also a great alternative to natural wood and stone. It’s made from the bark of harvested cork trees and is a renewable resource, and it also has a soft feel that’s pleasant underfoot.

Cabinetry

The bathroom cabinetry in your home is an important aspect of its design. It is not only a practical storage solution for toiletries, towels and cleaning supplies, but it can also enhance the aesthetics of your bathroom. New bathroom cabinets can be made from various materials and designed in different styles to meet your specific needs.

One option for cabinetry is solid wood, which is a durable material that can be stained or lacquered to match the rest of your bathroom’s decor. However, since wood is porous, it can swell when exposed to humidity, making it more susceptible to warping over time. An alternative to solid wood is plywood, which is a sturdy material that can be crafted into attractive designs. This is a great choice for bathrooms because it can withstand humidity and moisture.

Another way to enhance the look of your bathroom is to install floating shelves. This is a popular trend that allows homeowners to double the amount of storage space in their bathrooms without taking up valuable floor space. You can use the open shelf space for towels, baskets, vases and other decorative items. You can also place some of your cleaning products on the shelf so you always have them handy when needed.

Choosing the right type of bathroom cabinetry is important for a successful remodel project. To ensure that your new cabinets will fit properly, measure the height, length and width of the room to determine the dimensions for your new cabinetry. If you are installing a double vanity, make sure that the distance between each cabinet is adequate so you can access your products easily.

To give your bathroom a modern feel, you can opt for flat cabinetry that does not have panels and a sleek profile. This style of cabinetry is often found in contemporary bathrooms and is available in many different finishes.

Lighting

The bathroom is one of the few areas in the home that requires a careful balance of task, ambient, accent and decorative lighting. A well-lit space isn’t only functional, but more flattering — it banishes unflattering shadows. A new light fixture may be all you need to brighten up a small bathroom, but it’s important to consider the style and placement of the fixture.

Vanity lights are a popular choice for above-the-sink lighting, but there are many styles to choose from. Some are designed to be centered horizontally over the mirror, while others feature multiple lights on a bar mount that can be aimed upward or downward. Some even have the look of a chandelier.

For an overall bath lighting solution, consider recessed fixtures with diffused shades. They offer ample light, are easy to install, and blend in with the ceiling. If you’re able to incorporate lighting upgrades during your bathroom remodel, it’s wise to add a dimmer switch, as this will give you the option to set the mood for relaxing or grooming in the room later on.

When it comes to choosing the best light bulbs for your bathroom, look at their color rendering index (CRI) and kelvin rating. A CRI between 80 and 98 mimics the color of natural light and helps reduce the blue tint that can sometimes occur in artificial lighting. If you’re considering a traditional torcherier or Hollywood strip style, it’s worth remembering that these fixtures are typically exposed bulbs, so they’ll be subject to more frequent replacement than other fixture types. That being said, they offer a classic design that’s ideal for bathrooms with vintage finishes or tile work.